March 2018

The next project up is LaundryMonitor which uses the most hardware of anything I’ve done so far.

I’d always wanted something that would let us tell if the washing machine or dryer was running but I never knew exactly the right way to detect it. After we got our solar panels I was doing research on how to track power usage and came across an article about current sensors and had the idea that I could hook up a current sensor to each appliance and watch the output voltage to know if the appliance was running. While trying to find a decent sensor I stumbled across a current switch which was more or less the same idea but had everything in one package – when the current was over a certain threshold the switch would close and that could be easily detected.

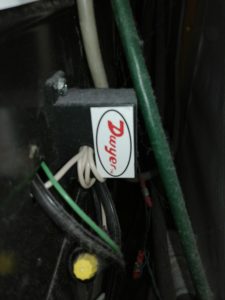
My first thought was to use a PowerState Tail but only a 120V version was available – there was nothing like it I could use for the 240V of the dryer. Eventually I settled on a Dwyer Miniature Current Switch and I’d use one each for both the washer and dryer just to be consistent.

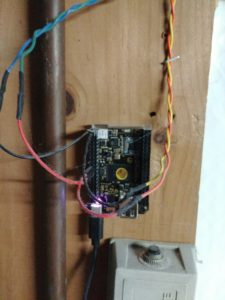
Next up was to figure out how to monitor the switch. I was going to use a Phidget I/O Board attached to a central server and run wires across the house from the washer and dryer to the I/O board but the idea of running all the wires wasn’t too appealing. I was about to try some sort of XBee setup when I found the C.H.I.P. Kickstarter and it seemed like it was worth a try – the C.H.I.P. was cheap, had digital I/O, had WiFi, and I could use anything that’d run on Linux to make it all work. The full board is probably a bit of overkill for just monitoring two switches but at $9 a device it really didn’t bother me that much.

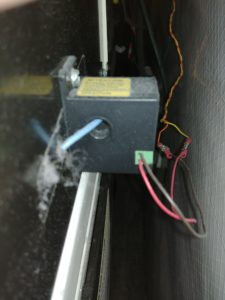
Hooking up the dryer was relatively easy – I opened the control panel, used the schematic to find the wire that powers the motor, disconnected the wire, ran the wire through the current switch, and reconnected the wire. I mounted the sensor on the back of the dryer for easy access in case I needed to adjust it but the motor draws enough current that the switch was able to detect it easily.

The washer was pretty much the same but I decided to monitor the main power line so I could detect if the washer was running at any point in the cycle. The trouble was that at certain times (like when the washer was filling) the current draw was way too low for the switch to detect even with the sensitivity set as low as possible. I solved this by looping the wire through the sensor several times to amplify the current to the point where the switch could pick it up.

From here on out things were simple – I just had to run some smaller wires from the switch to the digital I/O ports on the C.H.I.P. and then start working on the software. I ended up sticking the C.H.I.P. a few feet away by the power outlet so I didn’t need too long a USB cable to power it.

So far this has been running for a little over two years and the hardware continues to work well. I’m planning to do a similar build to monitor two sump pumps – the only change is that I’m planning to use the PowerState Tail since they’re both 120V with standard plugs so it’ll be a lot easier to hook up.

I’ll cover the software side of the project in my next post – right now the monitor is a standalone service that does all the work but since I’m going to be adding more devices I’m thinking that I need to break things up a bit.

I’m going to take a break from status windows for a little bit to cover my WorkIndicator project.

I’ve been working remotely for almost 14 years now and my family found it hard to tell when I was working or on the phone. It often looks the same whether I’m working or not – I’m sitting at my computer, sometimes with my headset on. At some point I came across a blog post by Scott Hanselman that described hooking up a status light to Lync and I was inspired to create something similar.

The first task was to find something I could use as a status light – after some research I settled on a USB HID Green/Yellow/Red Visual Indicator from Delcom. I liked that it had a stoplight design and it came with a C# sample – perfect!

My main workflow is to connect to my work system using Microsoft Remote Desktop so the easiest way to detect if I am working or not is to look for the remote desktop window. I created a class that uses SetWinEventHook to get ObjectCreate, ObjectDestroy, and ObjectNameChanged events and watch for a window with the title of my remote desktop window. If the window was found I’d set the indicator lights to yellow, otherwise I’d set them to green. Lately I’ve been using a VM as well so I updated the code to be able to look for multiple window titles – if any of them are detected the light is set to yellow.

Originally there was also Skype integration – I was able to use the Skype API to detect if I was on a call and if the call was muted. If I was on a muted call the right light would be on, and if I wasn’t muted the red light would blink. This made it easy for the kids to tell how quiet they needed to be when coming into the room. Unfortunately Skype no longer supports this API (and I’m not using Skype anymore anyways) so I removed this code from the project.

The application also has a tray icon with a menu so I can manually set my status – for example, I can select “talking” and the red light will blink. This is my workaround until I come up with something that’ll work for my current phone setup.

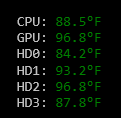
Next up in the “floating status window” category is SystemTemperatureStatusWindow. This one does exactly what it says on the tin – it shows various system temperature values.

The sensor data is read using the Open Hardware Monitor library which is pretty straightforward – the one catch is that it requires running as an administrator and getting a UAC prompt each time the application starts got a bit annoying after a while.

I first tried to solve this by splitting the application into two parts – a Windows service that ran with administrator privileges to read the sensors and a normal application to handle the display. While this got past the annoying UAC prompts (after the service was installed) I found that Windows doesn’t let you get GPU information from inside a Windows service.

After doing some more research I came across a workaround of using the Windows Task Scheduler to run the service as an administrator. I just turned the service into a regular application and set up the Task Scheduler to run it on system startup – problem solved.

Later on I added some command line switches to the service application that’d do the installation automatically. All I had to do was run the service once with a command line of “-install” and everything would get setup properly with just one UAC prompt.

I haven’t gotten around to adding an installer for this one yet but I definitely have plans to do so. I expect some minor complications setting up the service in Squirrel due to the need for administrator access but I think it’ll end up being doable.

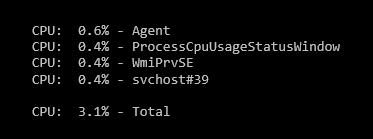
Now that I’ve written about my FloatingStatusWindow library I can start to talk about the projects that use it. First up is the ProcessCpuUsageStatusWindow project.

It is basically a mini task manager showing the top X processes by CPU usage and the total CPU usage of the system. The values update automatically every 2 seconds.

CPU usage is calculated by taking a snapshot of “% processor time” for the “Process” performance counter category every 2 seconds and having the counter sample calculate the percent usage for each process based on the previous snapshot.

This ended needing a lot more calculation than I had hoped although I don’t remember all the details as to why – one of the perils of blogging so long after the code was written. From what I remember what I first tried was built into .NET and was easier to code but used a lot more processor time than I was comfortable with. Perhaps that has since been fixed in a later framework version – someday I’ll have to try to recreate what I was doing.

One caveat – the code doesn’t always work quite right. I have seen a few times where the calculation comes out way over 100% but I haven’t been able to reliably reproduce it. It seems to be when either something hangs Windows or there’s exceptionally high disk usage. Either way – it works well enough for getting a quick look at CPU usage so I haven’t spent much time on it.

This was also the first project where I tried using Squirrel for installation and updates. I had used both WiX (with custom update detection and installation) and ClickOnce in other projects and I think I’ll probably go with Squirrel for most things going forward.