April 2018

My wife and a friend run The Crafty Coop (edit: now closed) – an event planning business that also sells handmade party decorations/favors online and at craft shows. One of the ways I help out is as the designated “IT guy” by handling the web/email hosting and other technical stuff.

When we were initially setting up the website using WordPress we looked for a widget that would generate a listing of their Etsy shop items but we weren’t really happy with the ones we found – they either required that the Etsy shop be broken up into sections or they didn’t quite display the way we wanted. I decided to try to write my own instead of tweaking one of the existing ones and Etsy Shop Widget was born.

I decided early on that I wanted to avoid generating the HTML in PHP as much as possible. I knew I’d have use some PHP for the WordPress admin settings but I wanted to use a front-end framework for the widget itself. I was already using Vue.js in other projects so when I found a template project for creating a WordPress plugin that used Vue.js I was good to go.

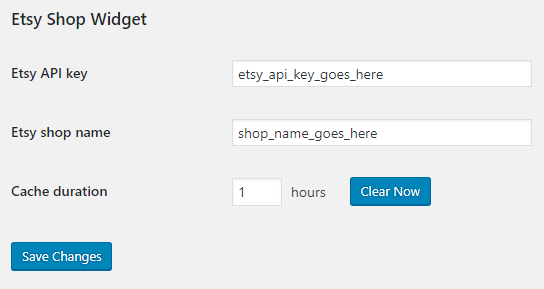
The Etsy API requires an API key and is rate limited so I wanted to cache the results rather than fetch them each time the page loaded. I added standard WordPress settings for the API key, the shop name, and the cache time and put them all in a settings section.

Right now this limits the widget to only one shop per WordPress installation but that’s all we need right now. In the future I’ll move the shop name to an attribute of the widget instead.

On the back end I created a custom WordPress action that uses the WordPress transients API to store the cached data from Etsy. Basically if get_transient returns some data then that data is simply returned to the caller, otherwise wp_remote_request is used to make the call to the Etsy API and the returned data is stored using set_transient with the appropriate cache duration.

function ESW_Listings_request()
{
    $listings = get_transient('etsy_shop_widget_listings');

    if ($listings === false) {
        $options = get_option('ESW_settings');

        $response = wp_remote_request('https://openapi.etsy.com/v2/shops/' . $options['ESW_Etsy_Shop_Name'] . '/listings/active?includes=MainImage&api_key=' . $options['ESW_Etsy_API_Key'] . '');

        $listings = $response['body'];

        set_transient('etsy_shop_widget_listings', $listings, $options['ESW_Cache_Time'] * 60);
    }

    echo $listings;

    die();
}

add_action('admin_post_esw_listings', 'ESW_Listings_request');
add_action('admin_post_nopriv_esw_listings', 'ESW_Listings_request');

The rest of the PHP side is pretty straightforward – there’s an “[etsy-shop-widget]” shortcode that generates an empty div with an ID of “etsy-shop-widget” that is used as the root of the Vue.js application and some code that links the styles and scripts generated by webpack when building the Vue.js code.

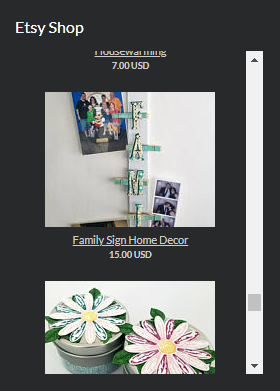
The front-end code is currently pretty basic as well. The Vue.js application just makes an AJAX request to the WordPress custom action, stores the resulting data in a component, and then uses the data to render a list of the item names, pictures, and prices.

@Component
export default class App extends Vue {
	listings: Array<EtsyListing> | null = null;

	async mounted() {
		const response = await Axios.get<EtsyResult>(window['esw_wp'].siteurl + '/wp-admin/admin-post.php?action=esw_listings');

		this.listings = response.data.results.sort((a, b) => a.last_modified_tsz - b.last_modified_tsz);
	}
}
<template>
	<div class="esw-listing-container">
		<div class="esw-listing-item" v-for="listing in listings" v-bind:key="listing.listing_id">
			<a :href="listing.url" target="_blank">
				<img class="esw-listing-item-image" :src="listing.MainImage.url_170x135" />
			</a>

			<a :href="listing.url" target="_blank">
				<div class="esw-listing-item-title" v-html="listing.title"></div>
			</a>

			<div class="esw-listing-item-price">
				{{ listing.price }}
				{{ listing.currency_code }}
			</div>
		</div>
	</div>
</template>

At some point I’d like the make the listing a little fancier – maybe with a single image and previous/next buttons rather than a simple scrolling list but we’re happy with the way it is working for now.

One of my most complete projects is Feed Center – an RSS feed reader designed to blend in with the Windows desktop.

Years ago when push technology was the hot new thing I got my online news from applications like PointCast and MSNBC News Alert – but they were eventually discontinued as web sites moved to other delivery mechanisms like RSS feeds. I tried to find an RSS reader but never really found one that I liked. I didn’t want some Outlook lookalike that I had to specifically open and read through. I wanted an app that would blend in with my desktop as much as possible and be something that I could glance at every so often for the latest news. At some point I started fiddling with creating my own and Feed Center is the result.

In theory Feed Center supports all of the common RSS versions and Atom with some special handling for common errors. The fact that I’m parsing the feeds with an XML parser makes it a little harder to handle the edge cases but it works well enough so far.

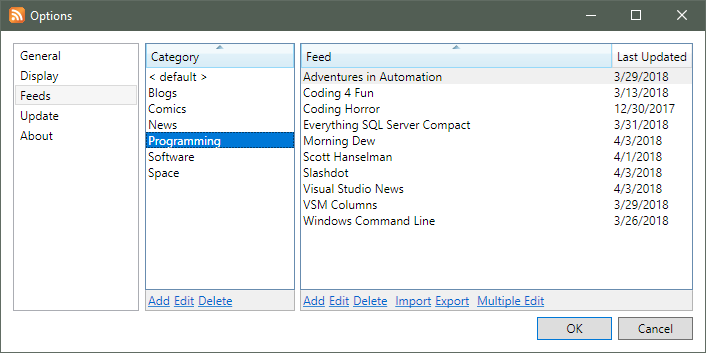
Feeds are added in a “default” category but they can optionally be organized into any number of other categories. The top of the main window has a selector for the current category – I’m not sure I like the way it looks but I haven’t come up with anything better yet.

The arrows at the top of the window (as well as mouse buttons 4 and 5 if you have them) will scroll through the feeds in the current category in alphabetical order. The current feed will also scroll automatically every minute unless the mouse is hovering over the window – it would be annoying to have the feed change when you’re getting ready to read one.

Double clicking an article will open the web page for the article. By default the system default browser will be used but there’s an option to choose another browser instead. There’s also buttons to open all of the articles for the current feed and to mark all of the articles as having been read.

The code base has had some major changes over the years – originally the UI was done using WinForms and I used XML files as storage. After a few corrupt XML files from power failures I switched to using SQLite and then to SQL Server Compact. At some point I rewrote the UI using WPF so I could get rid of a bunch of custom painting for the feed list.

The project has a full installer created with WiX that uses a modified bootstrapper to automatically relaunch the application after an upgrade.

Other than the code on GitHub I haven’t made anything public yet but I plan to use AppVeyor for build and deployment at some point – probably with the installer served as a GitHub release.

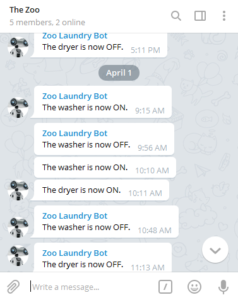
The software side of LaundryMonitor is currently pretty straightforward. The C.H.I.P. runs a Node.js application that keeps track of a GPIO pin for each current switch – when the switch is closed the appliance is on and when the switch is open the appliance is off. The application exposes a websocket that applications like HomeStatusWindow can watch and messages are sent to a family Telegram channel.

I use the onoff library to poll the GPIO pins every 500 milliseconds and wait for a pin to be steady for 10 seconds before registering the new state. Originally I tried to use an interrupt but during testing I found that the onoff library could get stuck if switch events came in too fast. I decided that I didn’t need real-time updates so a polling mechanism would be enough. I also originally didn’t have the 10 second wait time but I found that the washer had a few periods where it would stop completely between wash phases and it made the Telegram alerts somewhat spammy. It looks like there have been a lot of updates to onoff since I first created the application so I plan to see if the interrupt issue has been fixed and if I can use the new debounce support rather than my own custom code.

Since I’m planning to monitor more devices in the future I’m thinking about making the application that runs on each C.H.I.P. generic and moving the alert and websocket implementation to a central “home monitor” service. The monitor application on each C.H.I.P. would be the same (other than configuration settings) and just report the status to the central service which would be in charge of everything else.