Code

When I started this blog I had recently been laid off and figured it was as good a time as any to give some visibility to the code I had been creating over the years rather than hoarding it like a jealous dragon. I intended to keep up with it but then I started a new job and the writing sort of fell by the wayside. I kept working on projects when I could but never really got the chance to write about them. I’m hoping to be a bit more consistent this time around but only time will tell.

I’ve been mostly working on completely recreating my home monitoring project with both new hardware and software – I’ll write more about that in upcoming posts.

For the last week or so I’ve been doing Advent of Code 2019 so that I can follow along with my son. He got a good head start due to a few snow days at the beginning of the month but I’ve gotten ahead of him a bit as the challenges have gotten harder. We just spent some time getting his Intcode computer for day 9 working properly and I nearly swore off the entire contest while doing the second part of day 12 – the coding for that part wasn’t really a problem but it took me a bit to figure out the concept for doing it without brute force. I think it would have been more fair if the challenge better explained how to solve the problem and left the coding up to the participant but that’s probably just me being whiny. =) We’ve been posting our code in our GitHub repos in case anyone wants a peek:

I’ve been working in C# and he has been doing it in Python so it has been interesting to compare the two languages. I’ve been trying to get him to debug with breakpoints in Visual Studio Code rather than going old-school with print statements. It is definitely a process but we’re getting there!

My wife and a friend run The Crafty Coop (edit: now closed) – an event planning business that also sells handmade party decorations/favors online and at craft shows. One of the ways I help out is as the designated “IT guy” by handling the web/email hosting and other technical stuff.

When we were initially setting up the website using WordPress we looked for a widget that would generate a listing of their Etsy shop items but we weren’t really happy with the ones we found – they either required that the Etsy shop be broken up into sections or they didn’t quite display the way we wanted. I decided to try to write my own instead of tweaking one of the existing ones and Etsy Shop Widget was born.

I decided early on that I wanted to avoid generating the HTML in PHP as much as possible. I knew I’d have use some PHP for the WordPress admin settings but I wanted to use a front-end framework for the widget itself. I was already using Vue.js in other projects so when I found a template project for creating a WordPress plugin that used Vue.js I was good to go.

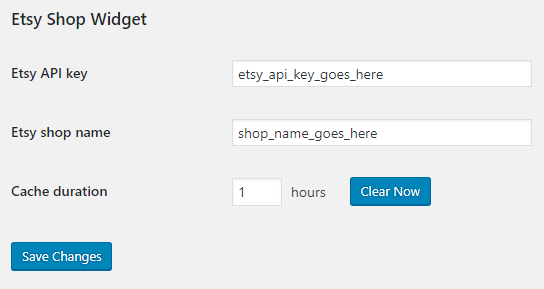
The Etsy API requires an API key and is rate limited so I wanted to cache the results rather than fetch them each time the page loaded. I added standard WordPress settings for the API key, the shop name, and the cache time and put them all in a settings section.

Right now this limits the widget to only one shop per WordPress installation but that’s all we need right now. In the future I’ll move the shop name to an attribute of the widget instead.

On the back end I created a custom WordPress action that uses the WordPress transients API to store the cached data from Etsy. Basically if get_transient returns some data then that data is simply returned to the caller, otherwise wp_remote_request is used to make the call to the Etsy API and the returned data is stored using set_transient with the appropriate cache duration.

function ESW_Listings_request()
{
    $listings = get_transient('etsy_shop_widget_listings');

    if ($listings === false) {
        $options = get_option('ESW_settings');

        $response = wp_remote_request('https://openapi.etsy.com/v2/shops/' . $options['ESW_Etsy_Shop_Name'] . '/listings/active?includes=MainImage&api_key=' . $options['ESW_Etsy_API_Key'] . '');

        $listings = $response['body'];

        set_transient('etsy_shop_widget_listings', $listings, $options['ESW_Cache_Time'] * 60);
    }

    echo $listings;

    die();
}

add_action('admin_post_esw_listings', 'ESW_Listings_request');
add_action('admin_post_nopriv_esw_listings', 'ESW_Listings_request');

The rest of the PHP side is pretty straightforward – there’s an “[etsy-shop-widget]” shortcode that generates an empty div with an ID of “etsy-shop-widget” that is used as the root of the Vue.js application and some code that links the styles and scripts generated by webpack when building the Vue.js code.

The front-end code is currently pretty basic as well. The Vue.js application just makes an AJAX request to the WordPress custom action, stores the resulting data in a component, and then uses the data to render a list of the item names, pictures, and prices.

@Component
export default class App extends Vue {
	listings: Array<EtsyListing> | null = null;

	async mounted() {
		const response = await Axios.get<EtsyResult>(window['esw_wp'].siteurl + '/wp-admin/admin-post.php?action=esw_listings');

		this.listings = response.data.results.sort((a, b) => a.last_modified_tsz - b.last_modified_tsz);
	}
}
<template>
	<div class="esw-listing-container">
		<div class="esw-listing-item" v-for="listing in listings" v-bind:key="listing.listing_id">
			<a :href="listing.url" target="_blank">
				<img class="esw-listing-item-image" :src="listing.MainImage.url_170x135" />
			</a>

			<a :href="listing.url" target="_blank">
				<div class="esw-listing-item-title" v-html="listing.title"></div>
			</a>

			<div class="esw-listing-item-price">
				{{ listing.price }}
				{{ listing.currency_code }}
			</div>
		</div>
	</div>
</template>

At some point I’d like the make the listing a little fancier – maybe with a single image and previous/next buttons rather than a simple scrolling list but we’re happy with the way it is working for now.


One of my most complete projects is Feed Center – an RSS feed reader designed to blend in with the Windows desktop.

Years ago when push technology was the hot new thing I got my online news from applications like PointCast and MSNBC News Alert – but they were eventually discontinued as web sites moved to other delivery mechanisms like RSS feeds. I tried to find an RSS reader but never really found one that I liked. I didn’t want some Outlook lookalike that I had to specifically open and read through. I wanted an app that would blend in with my desktop as much as possible and be something that I could glance at every so often for the latest news. At some point I started fiddling with creating my own and Feed Center is the result.

In theory Feed Center supports all of the common RSS versions and Atom with some special handling for common errors. The fact that I’m parsing the feeds with an XML parser makes it a little harder to handle the edge cases but it works well enough so far.

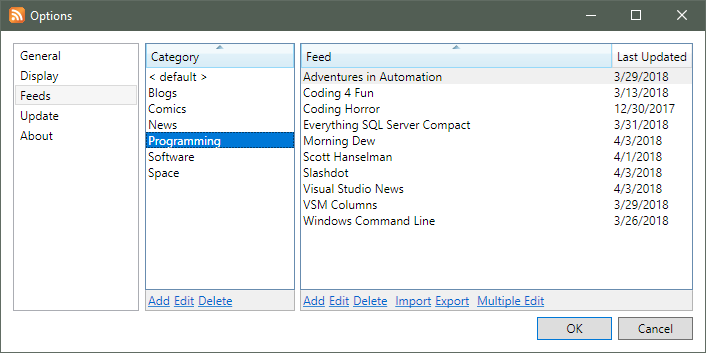
Feeds are added in a “default” category but they can optionally be organized into any number of other categories. The top of the main window has a selector for the current category – I’m not sure I like the way it looks but I haven’t come up with anything better yet.

The arrows at the top of the window (as well as mouse buttons 4 and 5 if you have them) will scroll through the feeds in the current category in alphabetical order. The current feed will also scroll automatically every minute unless the mouse is hovering over the window – it would be annoying to have the feed change when you’re getting ready to read one.

Double clicking an article will open the web page for the article. By default the system default browser will be used but there’s an option to choose another browser instead. There’s also buttons to open all of the articles for the current feed and to mark all of the articles as having been read.

The code base has had some major changes over the years – originally the UI was done using WinForms and I used XML files as storage. After a few corrupt XML files from power failures I switched to using SQLite and then to SQL Server Compact. At some point I rewrote the UI using WPF so I could get rid of a bunch of custom painting for the feed list.

The project has a full installer created with WiX that uses a modified bootstrapper to automatically relaunch the application after an upgrade.

Other than the code on GitHub I haven’t made anything public yet but I plan to use AppVeyor for build and deployment at some point – probably with the installer served as a GitHub release.

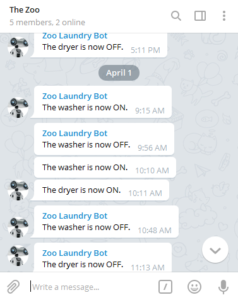
The software side of LaundryMonitor is currently pretty straightforward. The C.H.I.P. runs a Node.js application that keeps track of a GPIO pin for each current switch – when the switch is closed the appliance is on and when the switch is open the appliance is off. The application exposes a websocket that applications like HomeStatusWindow can watch and messages are sent to a family Telegram channel.

I use the onoff library to poll the GPIO pins every 500 milliseconds and wait for a pin to be steady for 10 seconds before registering the new state. Originally I tried to use an interrupt but during testing I found that the onoff library could get stuck if switch events came in too fast. I decided that I didn’t need real-time updates so a polling mechanism would be enough. I also originally didn’t have the 10 second wait time but I found that the washer had a few periods where it would stop completely between wash phases and it made the Telegram alerts somewhat spammy. It looks like there have been a lot of updates to onoff since I first created the application so I plan to see if the interrupt issue has been fixed and if I can use the new debounce support rather than my own custom code.

Since I’m planning to monitor more devices in the future I’m thinking about making the application that runs on each C.H.I.P. generic and moving the alert and websocket implementation to a central “home monitor” service. The monitor application on each C.H.I.P. would be the same (other than configuration settings) and just report the status to the central service which would be in charge of everything else.

The next project up is LaundryMonitor which uses the most hardware of anything I’ve done so far.

I’d always wanted something that would let us tell if the washing machine or dryer was running but I never knew exactly the right way to detect it. After we got our solar panels I was doing research on how to track power usage and came across an article about current sensors and had the idea that I could hook up a current sensor to each appliance and watch the output voltage to know if the appliance was running. While trying to find a decent sensor I stumbled across a current switch which was more or less the same idea but had everything in one package – when the current was over a certain threshold the switch would close and that could be easily detected.

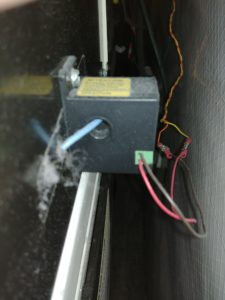
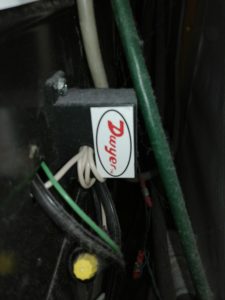
My first thought was to use a PowerState Tail but only a 120V version was available – there was nothing like it I could use for the 240V of the dryer. Eventually I settled on a Dwyer Miniature Current Switch and I’d use one each for both the washer and dryer just to be consistent.

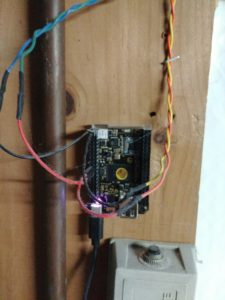
Next up was to figure out how to monitor the switch. I was going to use a Phidget I/O Board attached to a central server and run wires across the house from the washer and dryer to the I/O board but the idea of running all the wires wasn’t too appealing. I was about to try some sort of XBee setup when I found the C.H.I.P. Kickstarter and it seemed like it was worth a try – the C.H.I.P. was cheap, had digital I/O, had WiFi, and I could use anything that’d run on Linux to make it all work. The full board is probably a bit of overkill for just monitoring two switches but at $9 a device it really didn’t bother me that much.

Hooking up the dryer was relatively easy – I opened the control panel, used the schematic to find the wire that powers the motor, disconnected the wire, ran the wire through the current switch, and reconnected the wire. I mounted the sensor on the back of the dryer for easy access in case I needed to adjust it but the motor draws enough current that the switch was able to detect it easily.

The washer was pretty much the same but I decided to monitor the main power line so I could detect if the washer was running at any point in the cycle. The trouble was that at certain times (like when the washer was filling) the current draw was way too low for the switch to detect even with the sensitivity set as low as possible. I solved this by looping the wire through the sensor several times to amplify the current to the point where the switch could pick it up.

From here on out things were simple – I just had to run some smaller wires from the switch to the digital I/O ports on the C.H.I.P. and then start working on the software. I ended up sticking the C.H.I.P. a few feet away by the power outlet so I didn’t need too long a USB cable to power it.

So far this has been running for a little over two years and the hardware continues to work well. I’m planning to do a similar build to monitor two sump pumps – the only change is that I’m planning to use the PowerState Tail since they’re both 120V with standard plugs so it’ll be a lot easier to hook up.

I’ll cover the software side of the project in my next post – right now the monitor is a standalone service that does all the work but since I’m going to be adding more devices I’m thinking that I need to break things up a bit.

I’m going to take a break from status windows for a little bit to cover my WorkIndicator project.

I’ve been working remotely for almost 14 years now and my family found it hard to tell when I was working or on the phone. It often looks the same whether I’m working or not – I’m sitting at my computer, sometimes with my headset on. At some point I came across a blog post by Scott Hanselman that described hooking up a status light to Lync and I was inspired to create something similar.

The first task was to find something I could use as a status light – after some research I settled on a USB HID Green/Yellow/Red Visual Indicator from Delcom. I liked that it had a stoplight design and it came with a C# sample – perfect!

My main workflow is to connect to my work system using Microsoft Remote Desktop so the easiest way to detect if I am working or not is to look for the remote desktop window. I created a class that uses SetWinEventHook to get ObjectCreate, ObjectDestroy, and ObjectNameChanged events and watch for a window with the title of my remote desktop window. If the window was found I’d set the indicator lights to yellow, otherwise I’d set them to green. Lately I’ve been using a VM as well so I updated the code to be able to look for multiple window titles – if any of them are detected the light is set to yellow.

Originally there was also Skype integration – I was able to use the Skype API to detect if I was on a call and if the call was muted. If I was on a muted call the right light would be on, and if I wasn’t muted the red light would blink. This made it easy for the kids to tell how quiet they needed to be when coming into the room. Unfortunately Skype no longer supports this API (and I’m not using Skype anymore anyways) so I removed this code from the project.

The application also has a tray icon with a menu so I can manually set my status – for example, I can select “talking” and the red light will blink. This is my workaround until I come up with something that’ll work for my current phone setup.

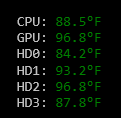
Next up in the “floating status window” category is SystemTemperatureStatusWindow. This one does exactly what it says on the tin – it shows various system temperature values.

The sensor data is read using the Open Hardware Monitor library which is pretty straightforward – the one catch is that it requires running as an administrator and getting a UAC prompt each time the application starts got a bit annoying after a while.

I first tried to solve this by splitting the application into two parts – a Windows service that ran with administrator privileges to read the sensors and a normal application to handle the display. While this got past the annoying UAC prompts (after the service was installed) I found that Windows doesn’t let you get GPU information from inside a Windows service.

After doing some more research I came across a workaround of using the Windows Task Scheduler to run the service as an administrator. I just turned the service into a regular application and set up the Task Scheduler to run it on system startup – problem solved.

Later on I added some command line switches to the service application that’d do the installation automatically. All I had to do was run the service once with a command line of “-install” and everything would get setup properly with just one UAC prompt.

I haven’t gotten around to adding an installer for this one yet but I definitely have plans to do so. I expect some minor complications setting up the service in Squirrel due to the need for administrator access but I think it’ll end up being doable.

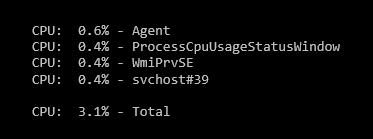
Now that I’ve written about my FloatingStatusWindow library I can start to talk about the projects that use it. First up is the ProcessCpuUsageStatusWindow project.

It is basically a mini task manager showing the top X processes by CPU usage and the total CPU usage of the system. The values update automatically every 2 seconds.

CPU usage is calculated by taking a snapshot of “% processor time” for the “Process” performance counter category every 2 seconds and having the counter sample calculate the percent usage for each process based on the previous snapshot.

This ended needing a lot more calculation than I had hoped although I don’t remember all the details as to why – one of the perils of blogging so long after the code was written. From what I remember what I first tried was built into .NET and was easier to code but used a lot more processor time than I was comfortable with. Perhaps that has since been fixed in a later framework version – someday I’ll have to try to recreate what I was doing.

One caveat – the code doesn’t always work quite right. I have seen a few times where the calculation comes out way over 100% but I haven’t been able to reliably reproduce it. It seems to be when either something hangs Windows or there’s exceptionally high disk usage. Either way – it works well enough for getting a quick look at CPU usage so I haven’t spent much time on it.

This was also the first project where I tried using Squirrel for installation and updates. I had used both WiX (with custom update detection and installation) and ClickOnce in other projects and I think I’ll probably go with Squirrel for most things going forward.

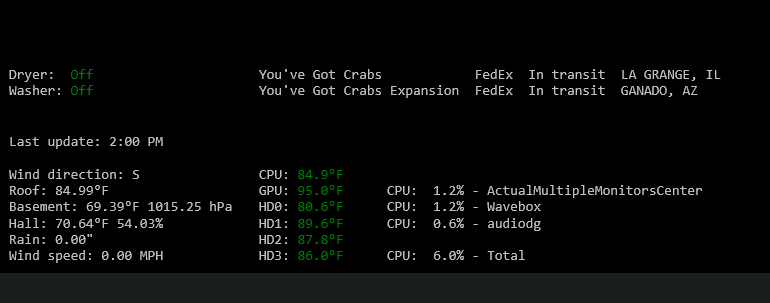
Something that shows up in a lot of my projects is my FloatingStatusWindow library. It allows the creation of something akin to a desktop widget that displays simple text and blends in with the Windows desktop. This is what several of them look like in the corner of my secondary monitor:

Each one is a separate project that uses the core library to create and manage the window. The code for a few of these is on GitHub and I’m working to add more.

The windows are locked by default to prevent accidentally moving them but they can be unlocked in order to move or resize them. When moving or resizing the windows will snap to each other and the sides of the screen. This is what the example above looks like unlocked:

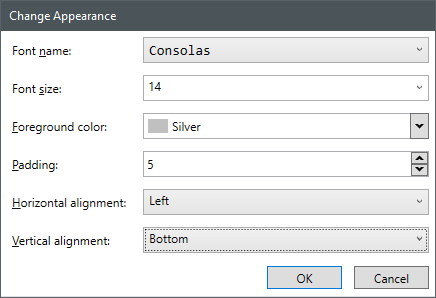
Basic appearance settings are built into the library itself along with a dialog to change them:

Each individual project is responsible for the text, the text layout, using a non-default text color, and keeping the text up to date. Some projects will update using a timer while others will wait for some sort of event and update as needed.

I had tried a number of applications that could do custom widgets but none of them quite worked the way I wanted. I read an article about transparent WPF windows and decided to create something myself.

Originally it was implemented as a single application that could load a number of plugins but that ended up being a bit of a pain – when working on a new window I had to close and restart everything and if a plugin crashed it’d take down all of the rest. I decided to convert it into a library that could detect other instances of the window so they worked together but were implemented as separate binaries.

There will be more about the library later when I write about the various applications that use it.

One of the oldest projects I’m still working on today is my weather station. I had always wanted a weather station but it seemed boring to just install something on the roof, stick an LCD display on the wall somewhere, and then forget about it – I wanted something I could build, expand on, and write my own software for.

At some point I ran across a weather station from AAG Electronica – it was relatively cheap, had a bunch of sensors, and ran on the Dallas Semiconductor (now Maxim Integrated) 1-Wire network. It was pretty much everything that I was looking for so I bought one, mounted it on the chimney, and set about writing an application for it.

At the time I was starting to learn C# and decided this would make a perfect learning project. There were a few examples for using the 1-Wire hardware (mostly in Java from what I remember) but I was able to access the driver functions from C# and started to get things working. At the lowest level there was a lot of bit manipulation but once that was going I was able to start building the application up from there.

The code and application has changed quite a bit over the years. Originally it was split into two libraries – one for the 1-Wire network and one for weather devices like temperature and pressure – and a WinForms application that displayed the current readings and graphs of the last 24 hours of readings.

Eventually I wanted to view the readings remotely so the application was refactored into a service that ran on the server with the hardware connection and a viewer that could run anywhere. It used .NET remoting (the recommended technique at the time) to connect the two pieces. This worked okay for a while and I created a few different applications to view the data – more about them in later posts.

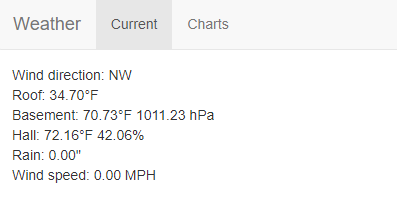
Later when I got a smartphone it made sense to create something that would let me view things from my phone. I started down the path of creating an Android application but then decided that it’d be better to create a web application that could be used everywhere. I added a SignalR interface to the service and created a basic AngularJS 1.x web application as the viewer.

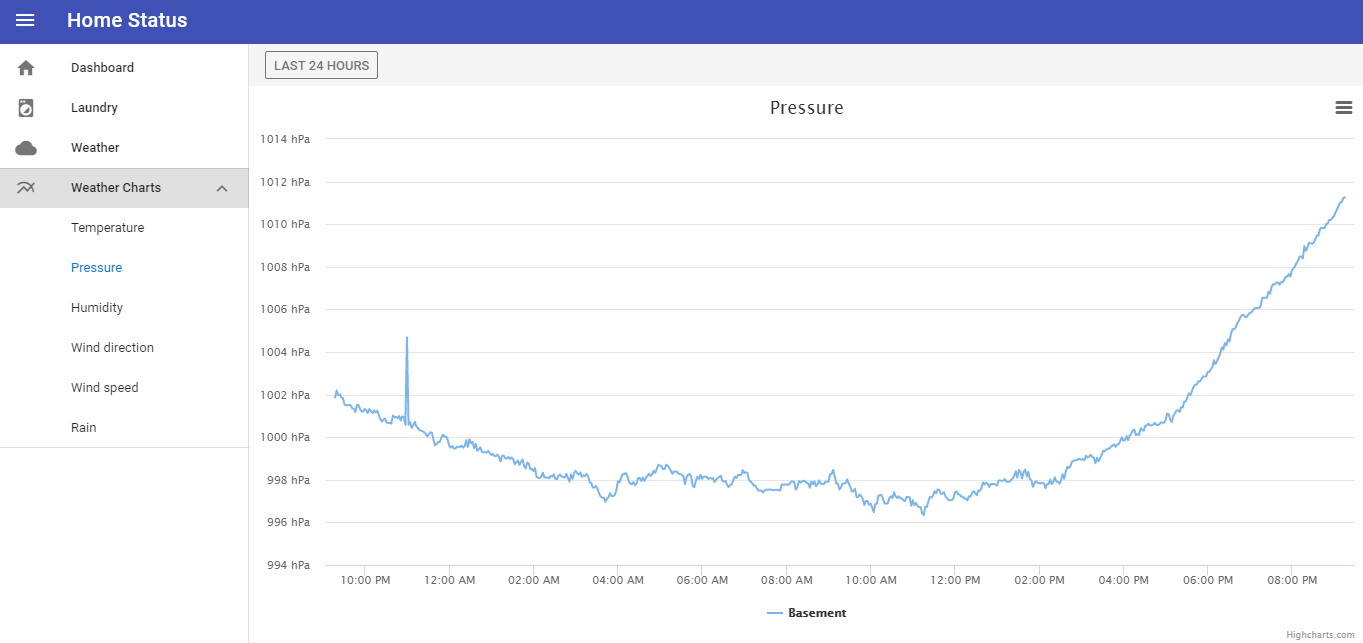
The AngularJS 1.x application worked well for a while but started to show its age so I decided to re-write it with Vue.js and that’s where things are now. The new web application also integrates with some of my more recent projects like the laundry monitor that I’ll write more about soon.

At this point the WeatherService project is responsible for reading the sensors, writing the readings to the database, and providing historical data for charting. It still uses my original OneWireAPI library to access the 1-Wire network.

Unfortunately AAG seems to have gone out of business so it is probably impossible to create the same setup or for me to get replacement parts. I’ve been looking at some off-the-shelf weather stations that I can read in a similar way but I haven’t found anything I like so far. I’ll probably be forced to find something soon since I’m starting to have some problems that look like hardware issues.